MongoDB is one of the most demanded NoSQL databases. It is a scalable, robust, and reliable platform. Mongo is a NoSQL database because it uses a traditional relational structure but JSON-like documents with dynamic schemas. Unlike relational databases, MongoDB does not require you to pre-define the data schema. On the contrary, you can change the schema without having to install a new database with the updated schema.
Sharding is an essential process when working with large databases. It is the process of storing documents across multiple servers and how MongoDB deals with big data. As the amount of data grows, one server cannot keep all the data, neither write it down nor give access to it. Sharding solves the problem by scaling horizontally. Thanks to this mechanism, we can connect additional servers for storing, writing, and reading data. For a smooth sharding process, we have created an innovative product — NoSQL Manager. Its unique qualities will help you to use shards quickly and efficiently.
Highlights of NoSQL Manager
NoSQL Manager is a project that was created to meet all user requirements in sharding processes in Mongo. Key features include:
- You can easily make or drop a database, manage collections and their indexes.
- All documents can be easily copied and edited. Filter and sort your files with ease.
- Performance monitoring tools allow you to analyze the sharding process in a matter of seconds.
- The functionality of our product is extensive. You can verify this by purchasing a software license.
Benefits of sharding with NoSQL Manager
Using NoSQL Manager for sharding Mongo, the user will be able to speed up and modernize processes:
- Connect to a sharded cluster directly or using SSH tunneling.
- View, add and remove shards easily using special dialogs and wizards.
- View collections shard keys.
NoSQL Manager allows you to carry out the entire sharding process in a matter of minutes in just a couple of clicks.
1. Connecting to a sharded cluster
NoSQL Manager automatically detects sharded clusters while establishing connection whether Standalone Host or Sharded Cluster connection type specified.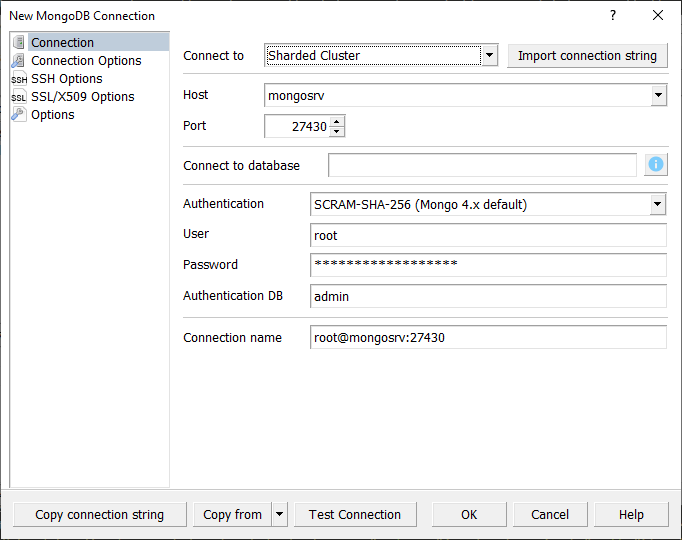
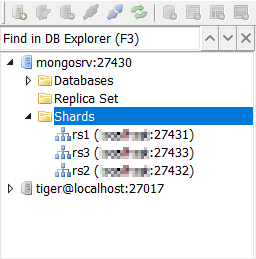
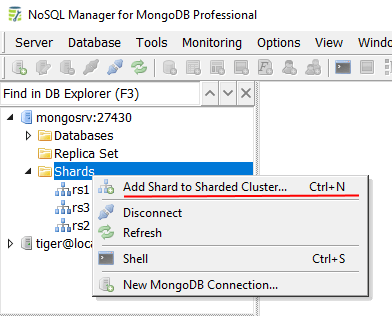
2. Adding new shards to a cluster
After the cluster connection is established your can see available shards in DB Explorer.
To add a new shard click Add Shard to Sharded Cluster... context menu item:
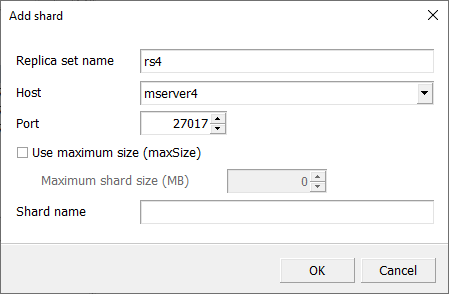
Next, specify the shard parameters and click OK button:
3. Deleting shards from a cluster
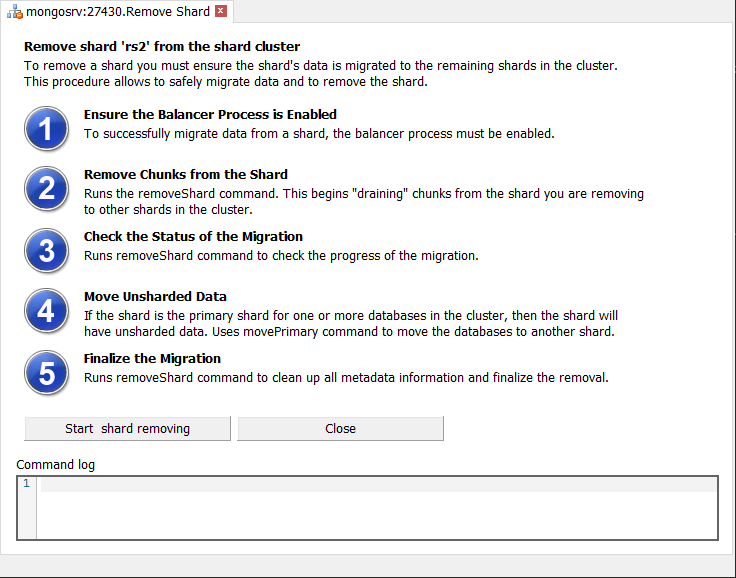
To remove a shard from the sharded cluster you need to perform 5 operations:
- Ensure the balancer process is enabled.
- Remove chunks from the shard.
- Check status of the migration.
- Move unsharded data.
- Finalize the migration.
It looks complicated, but with NoSQL Manager you can automatize this process. Select the shard you want to remove in DB Explorer and click Remove Shard from Sharded Cluster context menu item to open Remove Shard tool.
Next, press the Start shard removing button and wait for the process to complete.
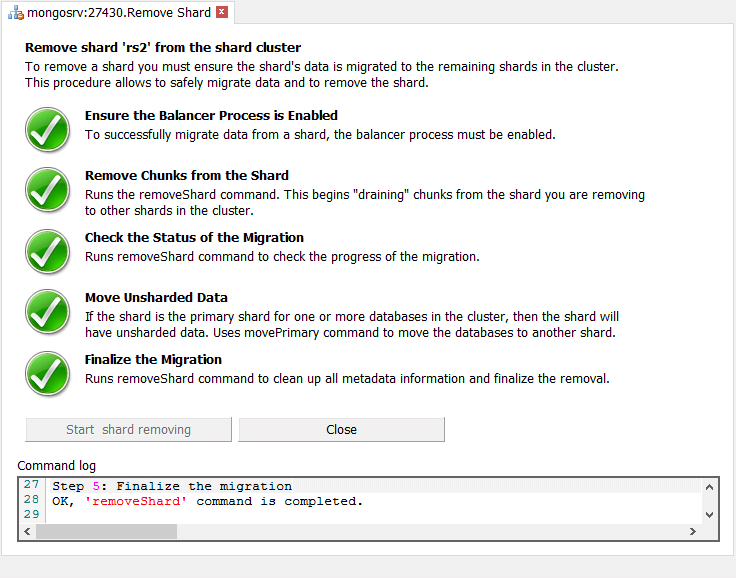
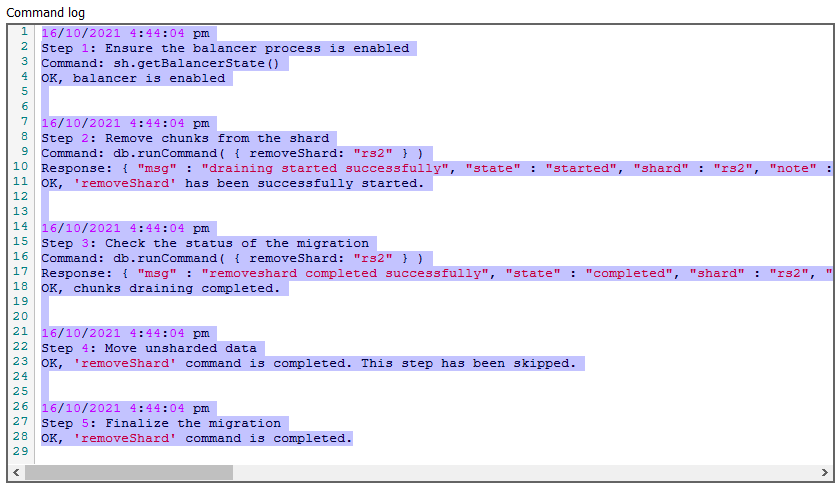
You can find the operation details in Command log:
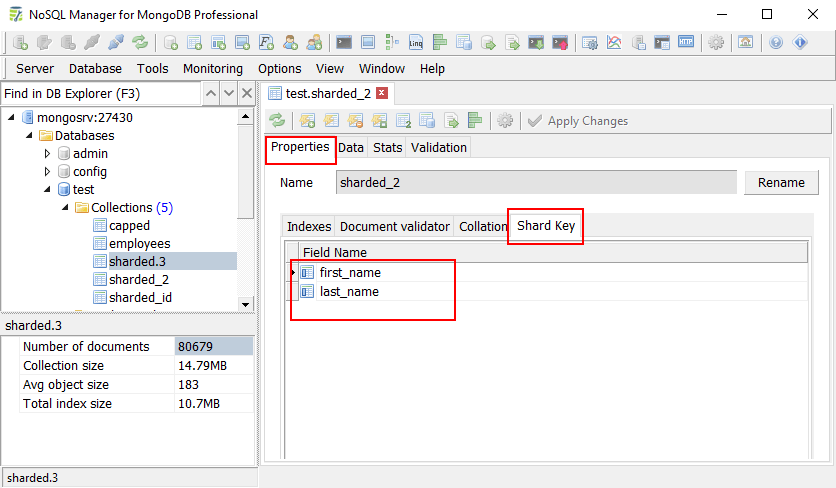
4. View collection shard keys
To view a collection shard key, open the Collection Editor, go to Properties tab, next click Shard Key tab:
Purchase a license to get the entire list of professional help and features from our product. You also get a year of free software updates and support from our company by getting a license. Buy our product to start working with MongoDB and sharding quickly and without the risk of data loss.